
How to make a Rubble Diorama Base - Warhammer 40k Terrain Tutorial Hobby Guide
May 11, 2020
Hail #Warmongers
If not Hello!
I'm Andy and I'm a UK based hobbyist and miniature enthusiast - painter/ kit-basher and proud member of the #warmongers and #Warhammercommunity. Come say hi on my socials!
I'm Andy and I'm a UK based hobbyist and miniature enthusiast - painter/ kit-basher and proud member of the #warmongers and #Warhammercommunity. Come say hi on my socials!
This post is going to go through how I designed, crafted and painted a rubble diorama for my Thunder Warrior project - if you haven't seen the previous post about how to make Thunder Warriors, I'd really appreciate if you checked out that post too!
This Tutorial is going to cover the assembly and planning of the diorama - if you'd like to see how I painted it, let me know!
I hope you find this tutorial helpful and inspiring, if so - please share with your friends and leave me a comment down below!
The techniques and steps for this piece are super simple and can be used for a variety of different projects, you don't necessarily have to make a diorama like this one - you could make smaller bases for individual minis or even a large scale terrain piece for tabletop gaming.
Before we get into the tutorial here is the finished diorama -

Foundation -
So this step was actually super simple for me. Usually getting your hands on something solid to work on would either cost money or a lot of time to make. I guess I got lucky in this case. For a lot of dioramas or display miniatures hobbyist use a wooded plinth or block of some kind. For me I used what was around the house.
My other half has quite the unhealthy candle obsession and we have a fair few that have been used and were ready to throw away - luckily for me Woodwick candles have a wooden lid which is perfect for what I wanted.
Now I wouldn't recommend buying these purposefully just to use as bases, as that wouldn't be very cost effective - but have a look in your cupboards and see if you have some lying around. Maybe you could find something similar?
Here's a pic of what to look out for -
 |
| Buy one as a gift.... then steal the lid! No one will know haha! |
So with the wooden block taken care of all I had to do was turn it into something truly grim dark!
Concept and design -
As this diorama was designed for one specific project I wanted make sure it suited the minis that were going to be affixed to it. This did limit my options in terms of material and colour but I feel the finished result could still be used for a wide variety of models.
With this being a Thunder Warrior project it had to be based on Terra (Earth) during the Unification Wars (pre the Great Crusade). To me this meant the diorama had to be -
- Rocky or had rubble
- Barren - Dusty or sandy (desert like)
- Little to no vegetation or plant life
- No water or moisture, dry
- Time worn, damaged
In addition to this, because I knew the mini's would be gold I wanted to make sure the minis stood out. So when it came to choosing colours I wanted something muted and pretty dark to show off the Thunder Warriors in the best way without doing something crazy like blue or black or even a nighttime base - which for me would have been too difficult.
After a bit of googling I came across several images of ruined buildings and rubble that had a rusty, dirty brown/red colour which I thought was perfect for what I wanted.
Here's a pic I used as inspiration - ( You can use whatever reference you feel suits you!)

Here's a pic I used as inspiration - ( You can use whatever reference you feel suits you!)
So with reference pics in-hand I'd settled on a look and a colour scheme, so I moved onto gathering materials.
Basing Materials -
Disclaimer - I have no idea where most of my basing materials have come from, as these were gifts from my other half, but just so you have a general idea of what I've used here's a list -
- Cork (actually from a old coaster)
- Slate (from the garden)
- Cork rubble
- Sand
- Gravel
- Small rocks/stones
- Plastic faux rocks
- PVA Glue
- Armageddon Dust ( Games Workshop paint)
- Plastic Skulls (Games Workshop)
- Metal Staples
You can obviously use whatever you like. There's so much out there, go nuts!
Before I go into a step by step, here's the base unpainted so you can see the elements mixed together -
 |
| Can't spell Hot mess without hot... |
The following steps are super simple but if you want more info - don't hesitate to get in touch!
Tip - The best advice I can give for this stage is patience. If you're using larger pieces, place these first and work around them. Add in stages allowing each stage to dry before moving onto the next one.
Step 1 - Cork
After a few minutes of playing around with the pieces of cork I had, I decided to layer up some of the larger blocks to add some height to the rear of the base. I made sure there was enough space for one or two minis on the raised area so that once placed you could see each mini clearly without them covering each other.
For this base these large cork sections were meant to represent slabs of concrete or collapsed wall sections so I wasn't too concerned about having straight edges or flat areas. But I did want to make sure they seemed cracked and damaged enough to pass as rubble so I made sure to break sections apart, but then remarry those pieces back together to add the cracked effect, without having large disjointed pieces.
I'd recommend playing around for a few minutes with the placement without any glue. The more pieces you plan on using, the more you should plan where they are to go. Also if you are using cork to represent large rocks or boulders, try to avoid straight edges and be sure to break up your pieces and make them as rough as possible.
Step 2 - Rebar
To really sell the ruined building look, I though I'd add some rebar to the cork made from paper clips.
If you're making your own, you can use as much as you like - but I've found less is more. I made sure enough was jutting out at different angles just to add a little variation. Some of the smaller pieces were even skewered onto longer lengths of rebar in strips and then added to the base after.
TIP - I found bending the ends of the paper clips after sticking them into the cork was much easier than bending it first and then trying to force the bent metal into the cork.
After the first two steps here's what I ended up with -
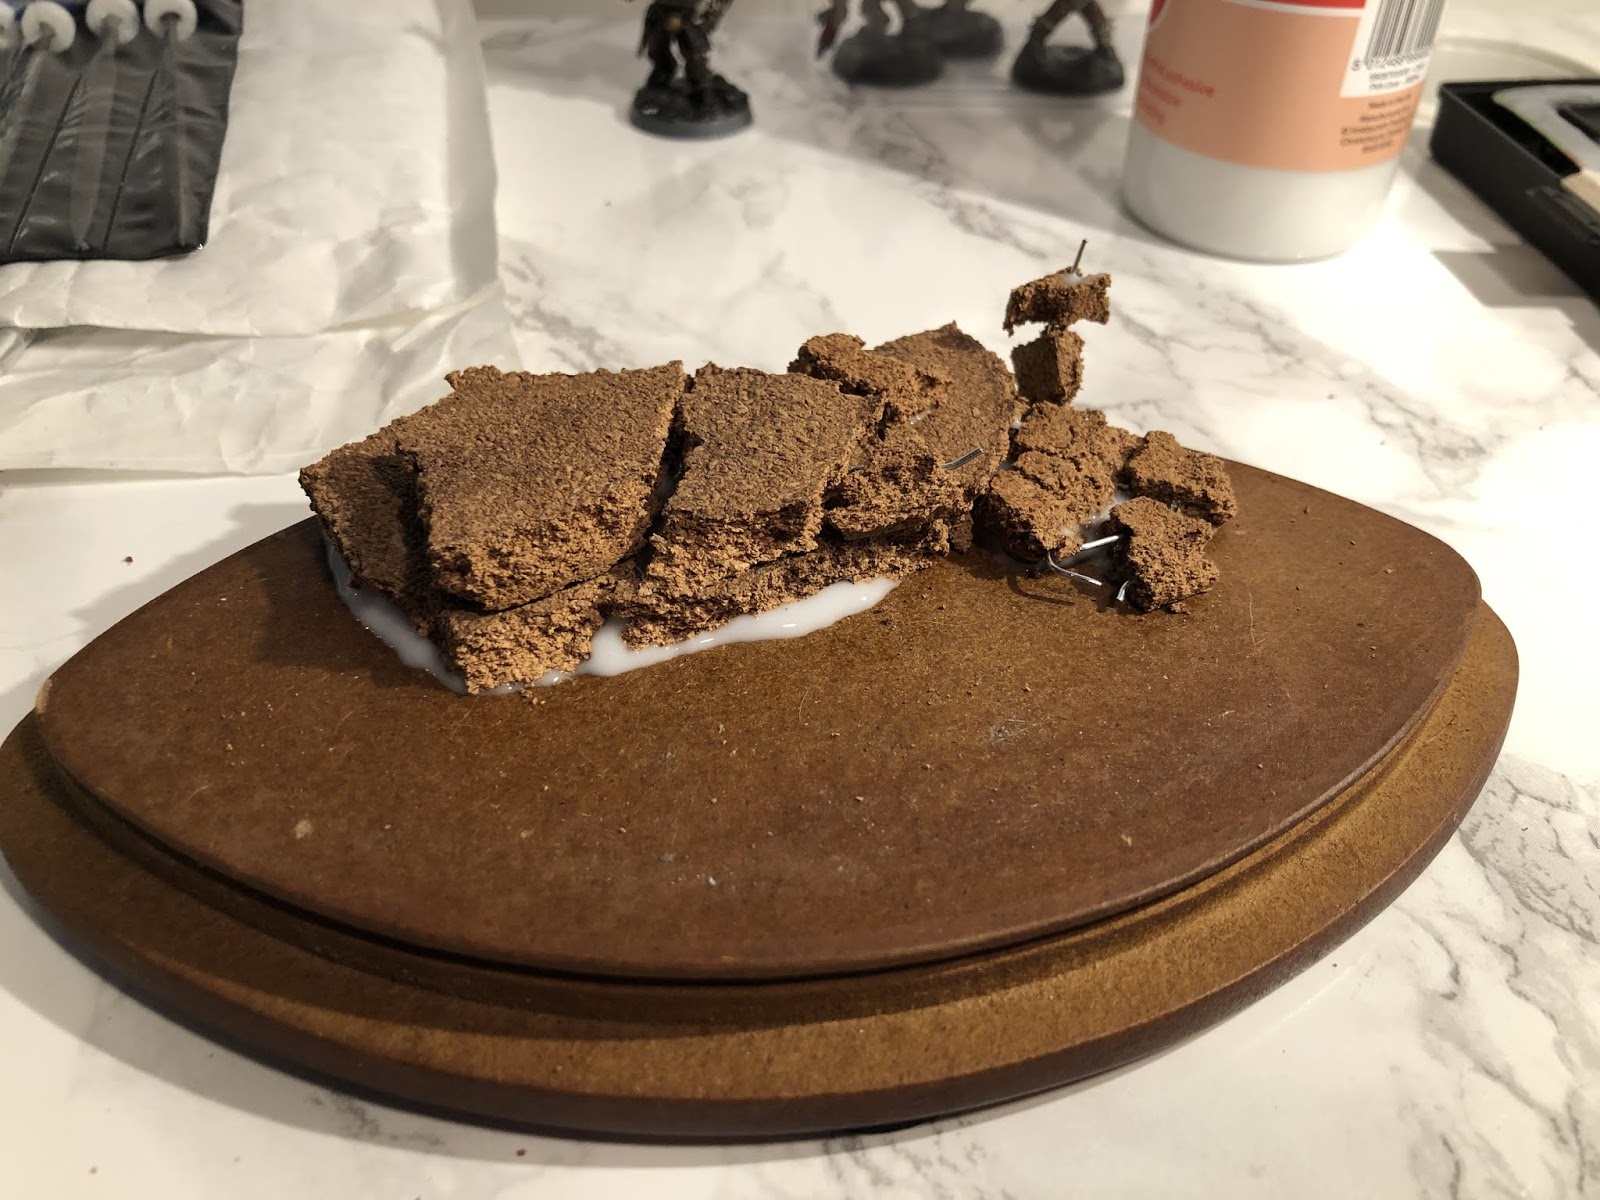 |
| As you can see I was really liberal with the PVA glue, but it all got covered up in the end so no big deal |
Not a lot of planning in this stage, but I did want to add a little depth to the base after I'd already built up the back. So I made sure to align the slate facing out (towards) and hanging over the edge, again to add a little variation.
For the larger rocks and stones, the trick was to make sure I left enough empty space to give each mini room.
Here's what that looked like -

Step 4 - Cork rubble and gravel
Again super simple. The general idea here was to start big in the centre and leave the outer edges clear. Still working from the premise that less was more but making sure there was plenty spread across the base to give it a nice texture and it also helped fill in the gaps between some of the cork pieces.
Tip - After this stage has dried, I'd suggest giving the whole base a good scrub with an old tooth brush. I found that the some of the cork rubble pieces didn't adhere very well and landed in funny positions that weren't very natural. By scrubbing, this dislodged any flimsy pieces that might have come off anyway, when I began painting. Don't worry if more comes off than you expect - simply reapply.
Here's the progress so far -

Step 5 - Sand and skulls
I'm sure most if not all of you have used sand for basing so I wont go into detail here. Again, the skulls (not too many) were spread out here and there to add a little detail. I also made sure to use a mix of different skulls form the sprue.
Tip - before the PVA dries, scrape any sand away from any edges or rocks that it may be clinging to at an unnatural angle. You can obviously add more sand to build up to certain surfaces, as if it has collected in the wind, but you dont want it to appear to be defying gravity.
Here's a closeup -
 |
| Wouldn't be grim dark enough without skulls! |
Some of you might not of used the GW texture paints before but for me they've proven to be really useful.
In most tutorials they're designed to replace a lot of the other steps we've just covered and allow you to cover a base in a light layer in a small amount of time. For me, I've found they're really good at building up and layering between different materials.
On previous project I might have spent hours waiting for layers and layers of sand or gravel to dry to achieve the same effect in minutes using the texture paint. It's a great gap filler too! Try it out yourself.
Tip - You can even add more material too the paint as its drying if you wish. Sprinkle more sand or gravel to give it even more texture. Just be careful to keep the pot closed as it does dry very quickly.
Here's what it ended up looking like -
Terminus -
That's everything guys! I do hope you found that helpful and insightful. If you feel I've missed anything or you want to know more - please get in touch via my socials.
I'd really love you guys to make your own at home - if you do please tag me, I want to see them!
Again thank you all for your continued support - please leave me a comment and let me know what you thought of this post and don't forget to share with your friends!
Remember to let me know if you'd like to see a tutorial about how I painted it!


0 comments